

Are you trying to find the best way to melt soap and wax in bigger batches? Our 16L Melter - White Enamel is the perfect option. Wax, butters, solid oils, soap bases, and other materials can all be melted using this wax melter. The 16L Melter is the ideal solution to melt, store, and pour more wax, whether you're a professional or a hobbyist crafting at home.
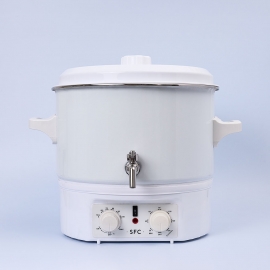
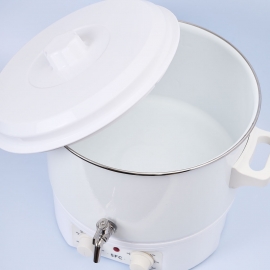
The body of this melter is composed of cold-rolled steel and is coated in white enamel. Our 16L melter has handles and a lid made of plastic. It also has a stainless steel tap, a thermostat, and a timer to help you melt your items and pour them precisely.
The 16L Melter is ideal for individuals looking for a quick and easy way to melt soap and wax. It's user-friendly design means customers, makers, and businesses can efficiently melt products with precision.
Please note, as your products melt from a solid to a liquid, the space condenses, and the level reduces. Always ensure you put enough product into the melter to hit the minimum line once melted.
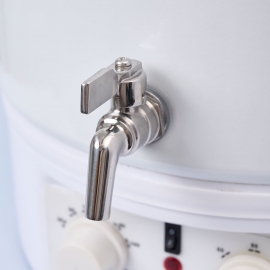
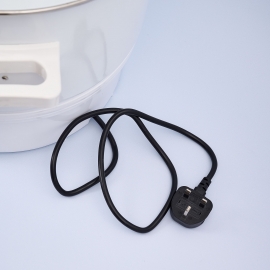
Before you begin, ensure your stainless steel tap is in the off position (lever facing left). Add your product to the pot, between the minimum and maximum lines. It should not exceed the 'MAX' line and not be below the 'MIN' line. Connect your melter to electricity, and set the thermostat to your desired temperature (left control), as well as put your timer to a set time (right control). If the middle switch is selected ‘On’ an alarm beep will notify you that the base has reached it’s temperature and your product will begin to melt. Once it reaches this set grade, you can turn off the alarm and adjust your timer clockwise to suit your required manufacturing time. Alternatively, you can turn the timer anti-clockwise to “continuous” to allow the melter to keep heating constantly.
When you are ready, slowly release the tap to remove the melted product, the machine will be hot so be careful during this step. When finished cut the electricity, turn off the thermostat and turn your timer to off ready to use next time.
Please note the switch above the indicator light is to enable the timer alarm function. This does not affect the heating process and the melter can be used when this is turned off.
When operating a wax melter, the start-up light will illuminate upon initially setting the temperature and timer gauge. This serves as an indication that the melter is functioning. Additionally, the light will periodically illuminate to signal that it is working towards reaching the set temperature. It is important to note that the light will intermittently turn on and off during the melting process, which is completely normal.
The beeping sound coming from your wax melter is completely normal and is attributed to the Timer Alarm. This alarm is activated by the middle switch on the front of the melter. When the switch is set to the "on" position (l), the alarm will sound to notify you that the temperature you have set has been achieved and the products are now melting. You can switch off the alarm by setting the switch to the "off" position (o). Additionally, you have the option to set a timer for the desired duration of heating or turn the timer control dial anti-clockwise to the "continuous" position to ensure the melter stays heated at the set temperature.
When utilizing the wax melter, the melting times will vary depending on the specific product and the amount being melted. The melting time can be influenced by the substances and materials present in each base, so it may require some experimentation to determine the optimal duration. Another helpful tip is to check the melting point of the product, which is typically indicated on the MSDS. It is important to remember that the melter is designed to melt gradually and at a slower pace in order to minimise the risk of burning.
Yes, the melter is ingeniously designed to heat slowly and prevent any unwanted burning. The heating elements are cleverly placed at the base of the melter, so it's important to allow ample time for the heat to conduct upwards. Additionally, it's recommended to stir occasionally to ensure even distribution of heat throughout the wax or soap.
If you've turned the tap forward to the central position and find that the melted wax/soap isn't flowing out, it's possible that there's a blockage. We recommend waiting, allowing the stainless-steel tap to properly conduct heat while the temperature is set on continuous mode, this will help with melting of the substance in the tap. As an alternative, you can cautiously use a heat gun to melt the solidified wax or soap inside.
Our machines have a slight variability of 5-7 degrees compared to traditional thermometers. This is due to the carefully selected material components used to maintain consistent warmth in the melters. For optimal results, we recommend pouring the melted wax or soap into a separate jug, allowing you to add your fragrances and create the perfect end product.

Plus, stay up-to-date with the latest news, tips, offers and inspiration from members of The Soap Kitchen community.


