
Natural Whipped Cold Process Soap
If you've never made natural soaps at home before, you'll need to make sure you have the equipment and utensils before you start.
This is an interesting version of a cold-process natural soap which uses whipped cold ingredients to product a light and airy soap which resembles a meringue. With experience this soap can be piped.
YOU'LL NEED.....
1) One good sized stainless steel or enamelled saucepan.
2) One heat-proof glass measuring jug or plastic jug able to withstand boiling water.
3) Accurate kitchen scales.
4) An electric hand whisk.
5) Stainless Steel or Wooden spoon
6) A mould to pour/scoop the whipped soap into whilst it sets. A wooden or cardboard tray or box lined with grease-proof paper or siliconised baking sheet is great. Silicone cake-baking moulds are also suitable, as are some other forms of plastic moulds such as 'tupperware' containers.
7) Eye and hand protection (safety glasses and rubber gloves).
8) A blanket or large towel.
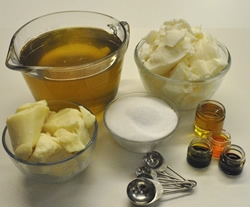
INGREDIENTS (excluding colour & fragrance)
244g of cold, clean water
95g of Sodium Hydroxide (Caustic Soda) beads or pearls
50g Olive Oil (preferably pomace grade but virgin or extra virgin will do)
200g Coconut Oil (Hard Variety)
400g Palm Oil (Hard Variety)
Step 1
Make sure you have all the ingredients and equipment listed above BEFORE you start and weigh them out into suitable containers ready to use.Always wear safety goggles/glasses and use protective gloves when soap-making to avoid injury from spills and splashes.
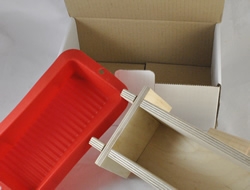
Step 2
First choose your mould. Traditionally, soaps are made in wooden moulds lined with waxed or siliconised 'greaseproof' paper, but a carboard box lined in a similar way is fine or you can choose to use a silicone cake-baking mould, as they are usually lye and heat-resistant. Also, many forms of plastic kitchenware will be suitable and may also not need lining, such as 'tupperware' type containers.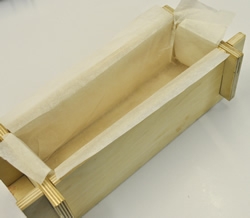
Step 3
If choosing a traditional lined wooden mould, make sure the lining paper is not cut or holed in any way below the top of the mould. It must be folded into corners etc. to ensure there are no leaks.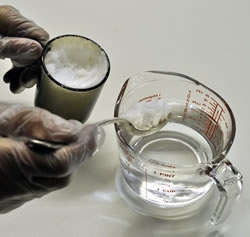
Step 4
Measure out 244g of cold clean water into a jug. Weigh (accurately) 95g of sodium hydroxide beads (or pearls) into a suitable container. Carefully add the sodium hydroxide to the water, stirring all the time with a spoon or spatular. Be careful not to breathe the vapour that is initially given off, so hold your breath and stir until all the sodium hydroxide has dissolved and there are no lumps stuck to the bottom of the jug.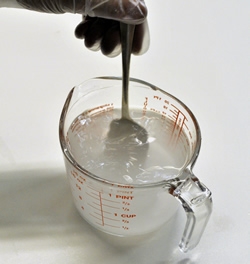
Step 5
The solution (now known as Lye) will heat up to nearly 200oF and will need to be left to cool. Important... If the room temperature is generally warm it will help to refrigerate the lye to ensure it's completey cold before use.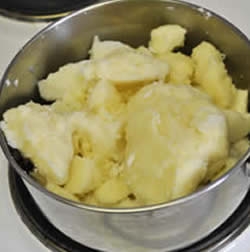
Step 6
Meanwhile, measure out exactly 200g of coconut oil and 400g of palm oil into the saucepan ready for whisking.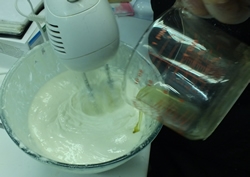
Step 7
Using an electric hand-held whisk (shown) start to whisk the coconut and palm oils into a creamy consistency, then continue whisking whilst incorporating the 50g olive oil.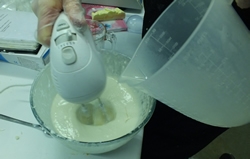
Step 8
Once all the oils are completely mixed and whisked to a light and creamy consistency, carefully and slowly add your cold lye, continuing to whisk all the time.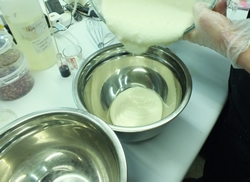
Step 9
Once you've added all your lye to the oils youare ready to add your fragrance or essential oils which you need to gently mix into the airy mixture. Step 10
For the purposes of this recipe we are dividing the mix into two in order to demonstrate the effects of colour. The mixture can just as easily be left as one or divided into more than two depending on the desired result.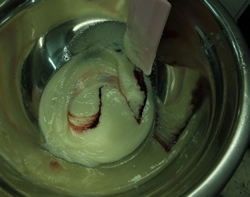
Step 11
Add a suitable colour (above shows liquid orange soap dye) to the divided mixture as required, gently mixing it in until the colour is uniform.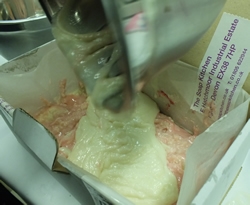
Step 12
The pour your mixtures into layers into your mould. The mix will be starting to thicken and can be gently worked to form peaks if you wish.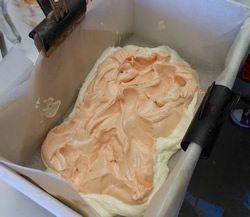
Step 13
Work your mixture a layer at a time to achieve the effect you desire.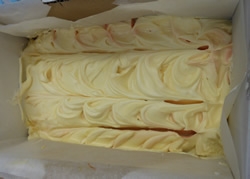
Step 14
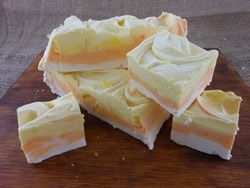
Above shows the filled mould having had the soap worked into a finish that looks a little like a meringue or whipped cream, then having been divided by dragging a spatula through whilst it's setting. Step 15
After leaving the mixture to saponify overnight until it becomes a light, whipped solid you can cut it into chunks as shown in this example of how it might be displayed or sold. These chunks will need to be cured for 3-4 weeks in the same way as other Cold Process soaps before they are ready to use.Tips
If packaging your soap, avoid absorbant paper or card coming into contact with your soap directly as any 'sweating' of the soap once packed will spoil the packaging. If you must use paper or card, wrap your soap first in something like waxed or siliconised paper or plastic film.
If adding fragrance use pure essential oil/s (20ml in this recipe size). Fragrance oils work better in whipped soap than in regular cold process soap, but for best results, especially as a beginner, choose essential oils.
Suitable and simple-to-use colourants for whipped soaps would be water-soluble dyes. Choose dyes which specify tolerance to alkali conditions. Avoid over-colouring your soap as the colour can bleed into the lather in use.


