

Posted on: 2017-09-20
 Hub
HubFor all things cosmetics and toiletry making!
This week's blog is written by Reece from Couples Candles. Couples Candles are based in Cornwall, England and run by partners Reece and Chlo. They started up the business in November 2016 after Reece lost his job. Ever since then they have been buying their ingredients from The Soap Kitchen and making great new products! They started off creating everything wax, from candles to wax melts, but now specialise in many products from creams to bath bombs, and from candles to whipped candles. Now, over to Reece... Today we are going to show you how to make a scented candle using soy wax. First things first, candle making can take lots of trial and error, especially when it comes to wicking your candle, make sure you get the correct size wick for your jar, not too big and not too small for it to tunnel.
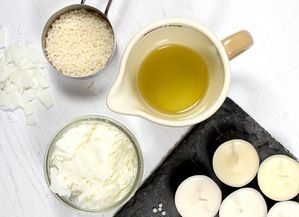
•Wax - We use ECO Soy Wax.
•Wicks - every wick is different, Depending on the size of the container and type of wax.
•Colorants - Do not use crayons as these can clog the wicks. Use candle safe dyes.
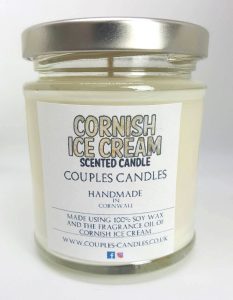
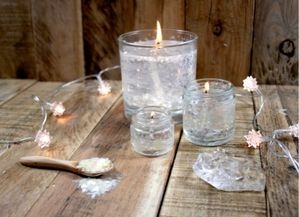
•Suitable container / Jar - We use 190ml Glass jars.
•Wicking pins - use this to keep the wick in the centre of the container.
•Double Boiler - This is to slowly and steadily melt the wax.
•Thermometer - Use this to make sure your wax isn’t too hot.
•Pouring Jug - This just makes life easier when pouring into your container.
Start off by measuring how much wax you need to fill up your container. To do this you need to fill the jar with water, transfer it into a measuring cup and round up to the nearest 10ml. deduct 20% off the amount and then that will be how many grams of wax to use. Example: our jars are 190ml 20% of 190 = 38. 190 – 38 = 152 Grams of wax Once you have measured out how much wax you need to transfer it to your pouring jug and place that into your double boiler. To achieve this fill a saucepan up with water and turn on the heat.
While your wax is slowly melting on a low heat, place your wick into your container. To make it stick to the bottom you can use many things, we suggest using glue dots that many candle suppliers sell. Make sure to get this centre as an off-centre wick can cause burning problems. Once you have the wick centred, use something to hold it in place, we use Popsicle sticks with a small hole drilled into the middle to keep the wick centre.
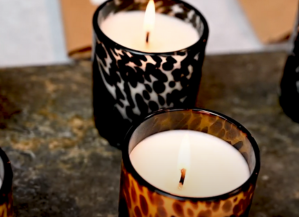
Once your wax has fully melted place a small amount of the colourants into the melted wax and stir well, make sure all of the colourants are incorporated into the wax. NOTE – the colour of the melted wax will always dry a lot lighter.
Take your wax off the heat and check the temperature. For Soy wax, we add our fragrance oils at 60c. Make sure to never add the fragrance oil when the wax is still hot, the scent will burn off and the hot throw of the candle will not be nice at all. Also, make sure you don’t add your fragrance when your wax is too cool! This will cause the wax to clog up when setting. Once your wax has reached around about 60c, it is time to add the fragrance, there are many ways to measure out the fragrance however, we do it by the most powerful sense we have, our nose! When we make a singular candle we put about 10-15 drops of oil in and then we simply smell it. If it smells good then we carry on, if not we add an extra 5 drops. You do not have to use fragrance oils in candles, you can, by all means, use the more natural essential oils, but here are a few things to remember about them,
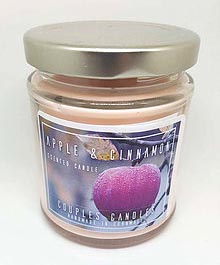
These are synthetic oils that have been created in labs, they are the most common and have a huge range to pick from.Fragrance oils have a huge range of scents! Candy floss, Bubble-gum, Apple!
Once you have added your colour and fragrance oil it is time to pour into your container! To do this pour slowly and carefully into your jar, if you pour too fast your wick may come loose. Make sure the wick is still centre and leave to dry for about 12-24 hours.
Once your candle has fully set trim your wick to about 5mm. never cut the wick too short or leave it too long. These can cause burning problems.
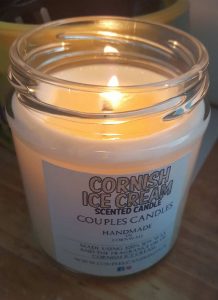
Now you’ve made your candle you want to burn in straight away, right? Unfortunately this is not the case, You have to leave your candle for 1-2 weeks for it to cure, This means the candle has time for the scent to come out, this also means when you burn your candle it will smell exactly like the scent you chose. After this you can use these candles for personal use, if you wanted to sell candles there are a lot more steps to take, I will go over a few of these now.[divider]
In the EU we have to comply with a few laws when using essential oils and fragrance oils, this came into effect in June 2015, the law states that when we use a chemical (fragrance oils or essential oils) in our non-cosmetic products we have to provide information on what is inside it. This can be very hard to get your head around. CLP is used to identify what ingredients are inside the product. One of your customers may be allergic to a certain chemical, therefore, they will read the label and make an informed decision whether they are going to buy it or not. Many larger companies do not use CLP because they can afford to pay the customer compensation when or if something does happen. Incidents like this don’t happen a lot, but its best to be safe than sorry. Unfortunately we see a lot of smaller companies not comply with the rules and regulations, which can hurt their business if something did happen. All candles need a generic safety label on the product, these can go on the bottom and they give general candle advice. Things like:
•Never burn a candle unattended never leave the candle in a direct breeze.
•Never leave the candle in a direct breeze.

Plus, stay up-to-date with the latest news, tips, offers and inspiration from members of The Soap Kitchen community.
.png)


Leave a comment
Login to post comments