
Bubbly Bath Bombs
Making your own bath bombs is very simple so it is suitable for supervised activities with quite young children. Just remember that citric acid will sting if it gets into cuts or scratches and will also be very irritating to the eyes, so if working with children be sure to take care in this respect and make sure no child rubs their eyes with hands just in contact with the citric acid.
EQUIPMENT YOU'LL NEED...
1) A large mixing bowl
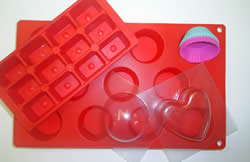
2) Suitable moulds to shape the bath bombs
3) Kitchen scales
4) A hand sprayer containing clean cold water
INGREDIENTS....
250g Bicarbonate of Soda
100g Citric Acid
50g SLS Noodles (or similar dry surfactant product i.e. Disodium Lauryl Sulfosuccinate)
10ml Fragrance or Essential Oil of your choice
Colour (most food/cosmetic/soap liquid colours are fine. Also powders i.e. ultramarine (not blue) and oxides)
Bubbly Bath Bomb Recipe Pack. BUY NOW.
Step 1
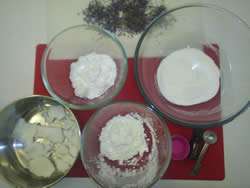
Measure out the bicarbonate of soda, citric acid and SLS noodles into the mixing bowl, seiving if necessary and thoroughly mix together until you have a consistent texture.
Step 2
If using liquid food or cosmetic/soap colours, add, in drops, enough colour to make the shade you want, mixing it in quickly to avoid it fizzing up.If using a powdered colour, simply add, a little at a time, and mix until you have your desired shade.
Step 3
Blend in the colour until you have a consistent shade throughout the mixture to avoid 'spots' especially important with powdered colours.SLS noodles will not take on the colour and so will appear speckled in the mixture. Other finer dry surfactants will take colour better.
Step 4
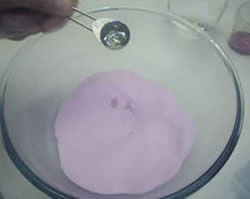
Measure 10ml of either fragrance or essential oil into mixture. Most essential or fragrance oils will not cause the mixture to fizz, but certain citrus oils may, so if this happens, mix in quickly and thoroughly.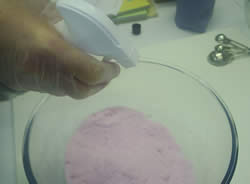
Step 5
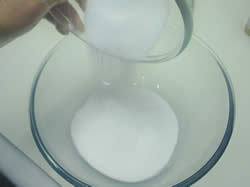
Now, a little at a time and working the mixture all the time, spray a little water on it with the hand sprayer. Mix continuously to avoid it fizzing-up in the bowl andONLY ADD ENOUGH WATER TO HAVE THE MIXTURE START TO HOLD TOGETHER WHEN LIGHTLY SQUEEZED IN YOUR HAND.
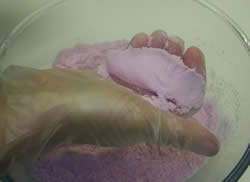
Step 6
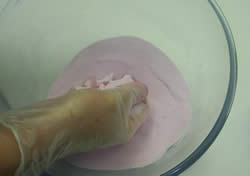
Test the mixture by squeezing some in your hand. It should JUST hold together and not be too damp. If you've made regular bath bombs before you'll find SLS will alter the texture of the mixture to that of regular bath bombs, but the procedure is unchanged.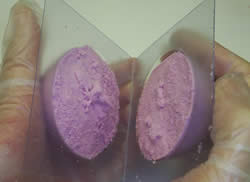
Step 7
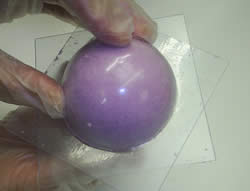
Once this point is reached you need to work quickly to compress the mixture into your moulds.If using our Bath Bomb moulds this mixture will make almost exactly 5 bath bombs using the 2 inch moulds. You will need 3 moulds, without clips, in halves, ready to fill.
Step 8
Fill each half just proud of the surface and press together for a few moments.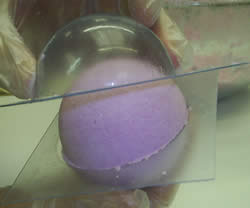
Step 9
Then remove one half, being careful not to let the bath bomb fall out.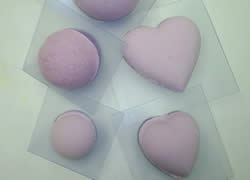
Step 10
Leave to set in the remaining half for 20-30 minutes (typical). You should end up with 5 bath bombs sitting in 5 half moulds with 1 half mould left, into which you can press any left-over mixture if you wish.Examples above in various mould shapes.
Step 11
You could choose to use all kinds of moulds including something simple like ice-cube trays or small yougurt pots, silicone baking moulds, cup cakes etc.. If making these with children it's often easier to use simple moulds that don't need 2 halves.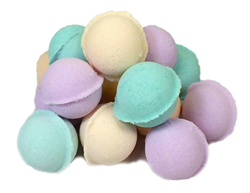
Step 12
After 20-30 minutes they should be quite hard. Simply take the bath bomb from the mould and leave it to dry. If they've not hardened enough, just leave them in their moulds a little linger and test again.Tips
To extend the life of your plastic moulds, don't leave the bath bombs in them any longer than necessary and wash the mould thoroughly immediately after use.To keep your bath bombs in top condition, keep them in a sealed container at room temperature until you want to display them.
Beginners will usually find Granular Citric Acid easier to use. To improve the look and finish of the bath bomb, use Powdered or very fine Citric Acid, although care needs to be taken not to use too much water or they will start to 'grow' before they set hard.


