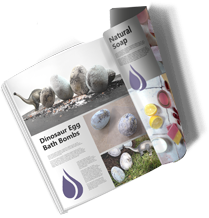
A guide to making bath bombs.
What you will need to make your own bath bombs: Sodium Bicarbonate Citric Acid Fragrance Oils Water Based Colours Bath Bomb Moulds Large Mixing Bowl
Step 1: Mixing
Mix 2-parts of sodium bicarbonate to 1-part citric acid (for instance you will need 500g of sodium bicarbonate to 250g of citric acid) into a large mixing bowl. It’s good practice to set aside some extra in a separate bowl in case you add too much water.
Step 2: Adding Colour and Fragrance to your mixture
In a separate bowl, mix your liquids. We recommend no more than 20ml per 1KG of mixture of fragrance oil, a few drops of colour will be enough to begin withIn a separate bowl, mix your liquids. We recommend no more than 20ml per 1KG of mixture of fragrance oil, a few drops of colour will be enough to begin with. Make sure there isn’t too much liquid, or your dry mixture will just fizz.. Make sure there isn’t too much liquid, or your dry mixture will just fizz.
Once thoroughly mixed, slowly add your water-based, be careful not to add too much so your mixture doesn’t get too wet, please note it is difficult to get deep colours such as purple or pink, so try not to overdo it. Your colour will foam a little and “ball up” when you try to blend it in, we recommend to squash the little balls against the side of the bowl with the back of a spoon and continue mixing to evenly distribute the colour.

Step 4: Prepare for packing into moulds
Your mixture should still be powdery when you move it about with your hand or spoon, but when you grab a hand full and squeeze it should stay packed together. A good test of this is to drop your lump of squeezed mix into your bowl. If it breaks apart completely it needs more liquid, either water-based colour or water, if the mixture is too soggy, add more bicarb and citric to dry it out.

Step 5: Moulding
Once you are happy with the bath bomb mixture consistency, spoon the mixture into the moulds and pack tightly until both cavities are overfilled. Carefully push the two halves together and squeeze firmly. Remove the top half - place a sheet of cellophane in your palm and turn the unmoulded half onto your palm. You should then be able to easily remove the other half of the mould. Place the bomb gently on a clean dry surface, and leave to dry overnight. Your bath bombs are now ready to use! Repeat the process with different colours, fragrances or try layering your different coloured mixtures for a great looking bath bomb. Try adding vegetable oils & butters for moisturising, SLS for extra bubbles, dried rose petals or even glitters to really enhance the look and performance your bath bombs.

Step 5 – The finished result
You should now have a variety of bath bombs ready to pop in the bath! Well done and enjoy!
We’d love to see your work!
Once you’ve made your bath bombs, take a picture and share your work on Instagram or Facebook and tag us!


